Over the years many boler owner’s, both new and long term, have asked lots of questions.
This section provides short answers to common questions about your boler trailer.
Longer and more comprehensive articles here.
I will continually be adding more Answers to Common Questions
When was the Boler Made?
The original Boler was introduced in Winnipeg Manitoba Canada in 1968. Through the years it was manufactured in Grand Prairie Alberta, Wichita Kansas, Peace River Alberta, Earlton Ontario, Calgary Alberta, and Winfield British Columbia, production ended in 1988. Read the full Boler History
How much does a Boler cost?
Prices for the Boler have been steadily increasing, current prices across the country range form $3,500 to $10,000+ with no indication of the work or repairs required. If you are interested in buying a Boler please use my Boler Buyer Guide to identify potential problems and repairs required.
Can I buy a new Boler?
Although the original Boler is no longer available, moulded fiberglass trailers live on today, under different names and companies. Their direct descendants still manufacturing moulded fibreglass trailers include: Escape Trailer Industries, Armadillo Trailers, Happier Camper, Oliver, Scamp, and Casita, are all well known versions.
Where can I find an original Boler?
As mentioned, original boler was made between 1968 to 1988. Although rare they do come up for sale, with their popularity prices have been steadily increasing, and they often sell within hours of being listed so you need to be prepared to act quickly. If you find one please use my Boler Buyer Guide to identify potential problems and repairs required, remember these trailers are old and often problems are covered up with paint or decorations, you need to look deeper to avoid an unexpected or expensive repair.
Places to look for a used boler:
- Fiberglass RV’s 4 Sale
- Fiberglass RV forum classifieds
- boler Facebook Groups (Boler.ca Facebook Group)
- Local classified ads, Craigslist, Kijiji
- If you see one talk with the owner,they may be selling or know of one for sale
How much does a Boler weigh?
Don’t be drawn into believing that a Boler only weighs 900 or 1000 lbs, this was the weight advertised which is the dry weight of the base version and excluded all options, propane tanks, water, etc. In the real world expect a standard Boler to weigh between 1400-1600 lbs or more, reasonably packed and ready for camping.
Can I pull a Boler with my car?
The answer is maybe, in short your tow vehicle should have a MINIMUM tow capacity of 2200 lbs and a hitch weight capacity of 220 lbs. Don’t believe salesmen, friends or social media. The only accurate information will be in your vehicle owner manual and by actually taking the trailer to a scale to weigh it.
Read my complete article Towing – Can I Tow a Boler With a …….
Will a water leak damage the inside of a Boler?
In general NO, with the exception of the fabric, cushions and on some the wooden floor. A Boler is made of fiberglass, the only wood are the cupboard doors and some early models with a wood floor, so essentially a Boler is like a fiberglass boat. Prolonged exposure to water can result in mold or mildew forming on the fiberglass or insulation but these can both be cleaned with cleaners and some elbow grease with no long term effects.
Can you still buy parts for a Boler?
YES, most of the parts used on a Boler are common items available at RV parts departments or other suppliers. If original parts are not available there are substitute replacements or creative options, Camping Treasures has a number of specialized boler hardware items including door lock replacement kits, hinge rebuild kits and more …. Check out my Boler Parts page if you are looking for something, if you cannot find it ask me, I probably know a source or a solution
Can you fix a 40 year old Boler?
Yes, yes and yes, anything on a Boler can be repaired, the body is fiberglass similar to a boat or a Corvette, the frame is steel and can be repaired or replaced.
How do I get the door on my Boler to fit?
There are a number of reasons that cause the Boler door to not close at the bottom and not fit properly. Read all about Door Hinges & Adjustments
What were the original boler colors?
The actual color is colored gel coat over the base fiberglass and not paint, they came in green/white, yellow/white, blue/white, red/white, grey/white, brown/white, and finally white/white.
What Size is the Coupler? The original Boler coupler (the part that connects to the tow ball on your vehicle) is only 1 7/8″ and is often quite worn. Any trailer or welding shop can easily replace this with an upgraded 2″ coupler. Do note that the Boler tongue angle is a narrow 30º (often used on boat trailers) rather than the more common 50º found on most RV’s.
Tire Pressure & Lug Nuts
It is important to check the tire pressures and tighten the wheel lug nuts before and during every trip. The maximum cold tire pressure will be marked on the sidewall of the tires, you should run your tires at this maximum pressure, this is usually around 55 to 65 psi. The lug nut torque for the 1/2″ NF lug nuts found on boler hubs is 100 ft-lbs., tighten the lug nuts in three stages, Tightening the nuts in a star pattern (shown below in the image) first torque to about 50 ft-lbs, then to 75 ft-lbs, and finally to 100 ft-lbs. 
Lights & Trailer Electrical Connection
It is important that all the trailer lights work and to keep the contacts of the trailer plug and the tow vehicle plug clean and free from corrosion. Simply spray the electrical contacts with WD-40 and plugging in and unplugging several times will help keep the contact clean and operating reliably.
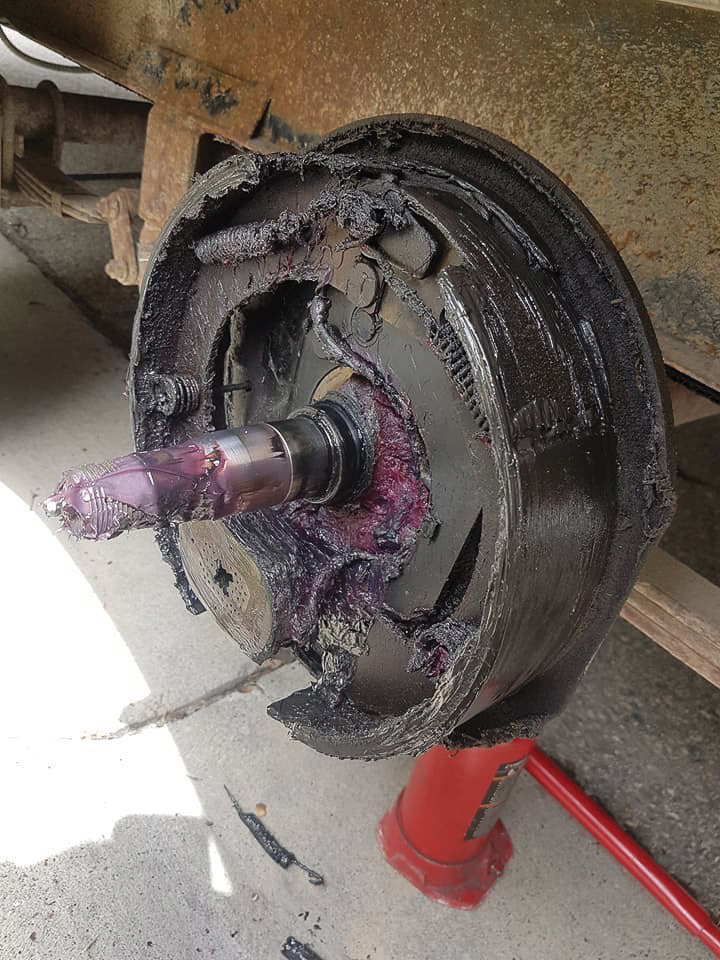
Wheel Bearings & Brakes
Your trailer brakes need to be checked and the wheel bearings need to be repacked every 24 months or 12,000 miles (20,000 km). As the grease ages it starts to break down and contaminates like dust and moisture reduce the lubrication properties. The contaminated grease needs to be fully removed, cleaned from the bearings, races and hubs and the bearings properly repacked with quality wheel bearing grease. EZ Lube axle or Bearing Buddy are advertised as the solution to repacking wheel bearings but they have some major drawbacks. First more is not better, these devices allow you to add more grease to your bearings but this causes problems, the old contaminated grease is not removed, that means the new grease is quickly contaminated. Adding more grease places pressure on the inner seal, when the seal fails grease will cover the brakes with grease which cannot be cleaned off, they need to be replace, also with the seal failure more dirt and contaminants can get into the bearing causing damage and potential bearing failure (picture below). It is so much better to just repack your bearing properly at the recommended interval. Repacking wheel bearings
© RV Lifestyle Magazine
Propane Lines & Connections
Perform a visual examination of all the rubber hoses, if they show any cracking they should be replaced. Check all the fittings and connection for leaks. The best leak tester for propane is a simple mixture of dish soap and water in a spray bottle. spray all the connections and look for bubbles, a leak will show up very quickly.
Battery
Just like your car make sure the battery terminal connections are clean, a mixture of baking soda and water can be used to remove large deposits, you can use a wire brush to clean the contact surfaces. Many RV deep cycle batteries are referred to as flooded cell batteries. As a battery goes through the charge cycles the result in a loss of water, regularly remove the caps on the top of the battery and make sure the plates are covered, add distilled water if you need to top up the cells.
Propane System & Components
The propane system comprises of a propane tank, rubber pigtail that connects the tank to the regulator, propane regulator, distribution tube, several “T” fittings, and supply lines to the refrigerator, cook top and furnace. The rubber used in the flexible hoses and regulator will deteriorate over time and should be inspected annually and replaced as needed. The original propane regulator was a simple one stage unit, the modern and improved two stage regulator should be used as the replacement. Maintenance on a propane system, components, and appliances should be performed by a qualified person using approved components and techniques.
Refrigerator
boler used a Tedco 202TW or Dometic DM 211 ammonia absorption 3-way fridge. These fridges operate silently, they take 8+ hours to cool off. In most cases they are most efficient when using propane, work extremely well on 110VAC, please note that operation on 12VDC uses a lot of power from the battery and should not be used for long periods of time. Additional manuals can be found here
There is no exact replacement for the original boler fridge, the current models that fit are slightly deeper and will require some trim added to give it a finished look. Norcold N323 or Dometic RM2193, about are about 1.75″ shorter, 2″ narrower and 3″ deeper
Although 2 and 3 way fridges (propane, 12VDC & 120VAC) offer the most flexibility while travelling the option of a low draw 12VDC can be used. These are often designed for use by long distance transport trucks, just remember that if your battery runs low your refrigerator will stop working.
Cooktop
boler used several different cooktops, the common ones were made by: Coleman, Brown Stove Works, and Suburban The top of the cooktop is held on with two spring clips, to remove the top gently pry up on each side to disengage the clips. To reinstall line up the top and clips with the corresponding holes and press down. When you have the top off it is a good time to check the propane line fitting with soapy water.
Manuals can be found here
Furnace
The original furnaces used by boler are gravity units that are very reliable and no electrical power is needed to operate them. Considering these furnaces are 40+ years old it is recommended that tey are inspected by a professional technician. Manuals can be found here
LPG Catalytic radiant heaters are an option but on these consider that for every pound of propane consumed, one ounce of water vapour will be created, the result is an increased amount of condensation inside the trailer.
Alternative replacement furnaces include Propex, Truma, or conventional RV furnaces from Atwood or a Suburban. No matter what heating solution you choose it is very important that a window is open during there operation and a propane detector and Carbon Monoxide CO detector are used.
Air Conditioner
Another common question is “can you add an RV or rooftop AC unit to a boler. The answer is NO. An RV roof AC unit weighs over 100 lbs and the boler shell is only 1/8” thick, the roof and walls are not strong enough and will collapse under the weight. A smaller home window style can be adapted and is sometimes installed under a dinette bench and vented through the wall or floor to the outside. Also there are some split AC systems where the compressor can be mounted on the tongue and the cooling radiator mounted inside.
Axles
boler uses a rubber torsion axle, it is a good system that requires little servicing other than the usual bearing repacking and maintenance. For detailed information on the axle please read my article
Torsion Axle – everything you want to know
Tire Size
Don’t go cheap on your tires, it is important to buy the best, a tire blow out on a Boler is disastrous.
Standard size for a 13′ boler is 175/80R13 ST. Use ST trailer tires, passenger car tires are not suitable for a trailer. It is also important to check the tire pressures, the tires should be inflated to the maximum cold tire pressure marked on the sidewall of the tires, this is usually around 55 to 65 psi.
On 17′ boler the original tire size was F78x14, the modern replacement tire is 205/75R14 ST
NOTE: If the tire size contains a “D” (bias ply) rather than an “R” (radial). “D” means it is bias ply construction and is not recommended as a reliable trailer tire.
Rim Size & Bolt Pattern
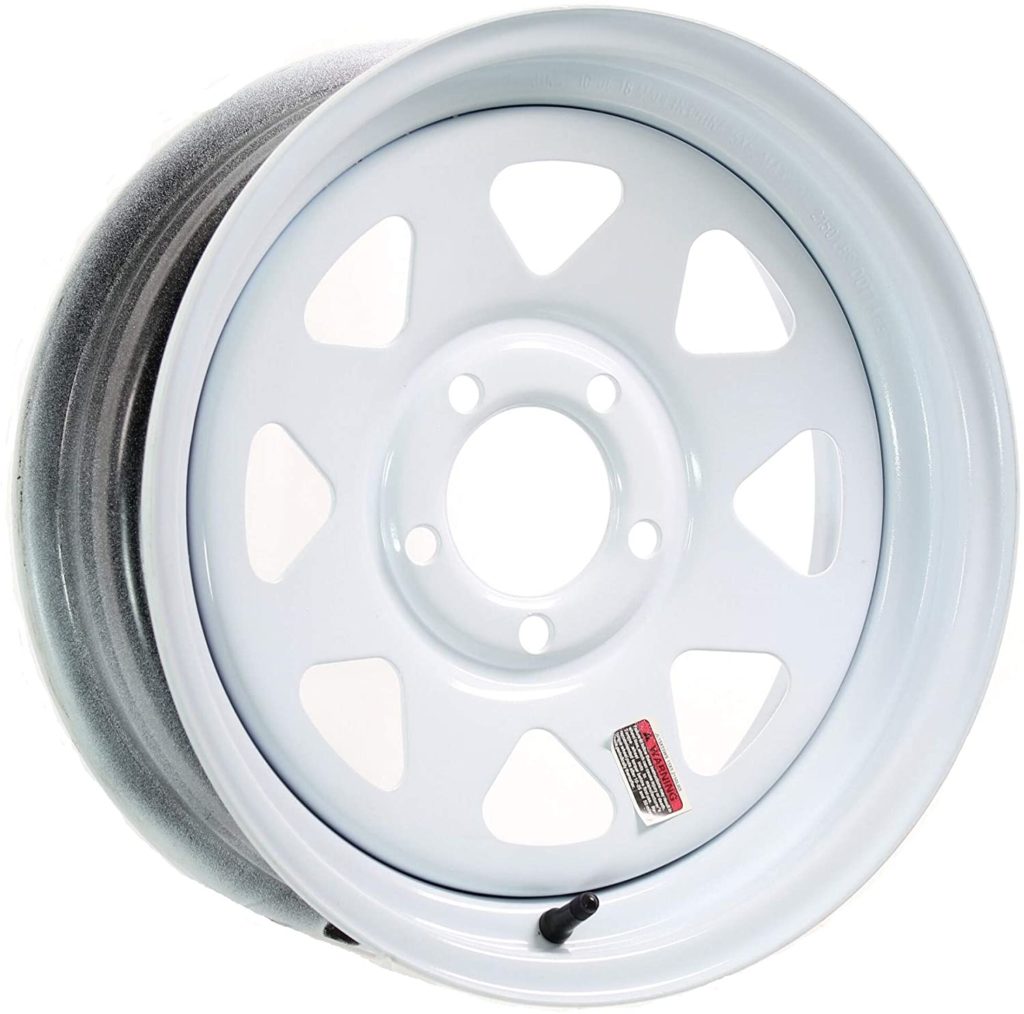
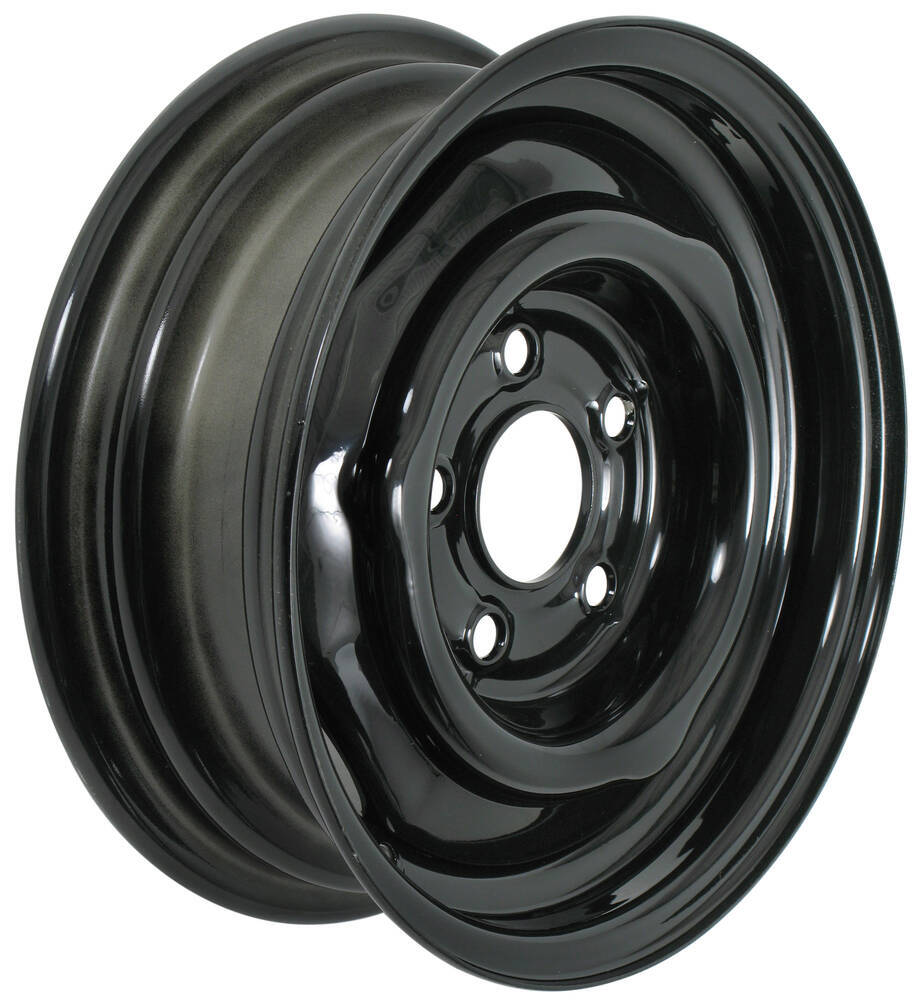
Most 13′ boler’s use 5 bolts on the wheels. Standard trailer wheel which fits is 13″ with 5 x 4.5″ bolts pattern, most are spoked steel trailer rims which are often painted white are available at many retail stores. One thing to keep in mind is hub caps like Baby Moon will not fit these rims that have a flat dished centre.
For Baby Moon hubcaps the rim needs a raised centre profile with three bumps that the Baby Moon hubcap will snap over. If you are interested in aluminum wheels any 13″ rim with 5 x 4.5″ bolt pattern and zero offset ± 0.5″ (centre mounting flange is centred in the rim) will work. The lug nut torque for the 1/2″ NF lug nuts found on boler hubs is 100 ft-lbs., tighten the lug nuts in three stages, Tightening the nuts in a star pattern, first torque each nut to about 50 ft-lbs, then to 75 ft-lbs, and finally to 100 ft-lbs.
Wheel Bearings
Your trailer brakes need to be checked and the wheel bearings need to be repacked every 24 months or 12,000 miles (20,000 km). As the grease ages it starts to break down and contaminates like dust and moisture reduce the lubrication properties. The contaminated grease needs to be fully removed, cleaned from the bearings, races and hubs and the bearings properly repacked with quality wheel bearing grease. EZ Lube axle or Bearing Buddy are advertised as the solution to repacking wheel bearings but they have some major drawbacks. First more is not better, these devices allow you to add more grease to your bearings but this causes problems, the old contaminated grease is not removed, that means the new grease is quickly contaminated. Adding more grease places pressure on the inner seal, when the seal fails grease will cover the brakes with grease which cannot be cleaned off, they need to be replace, also with the seal failure more dirt and contaminants can get into the bearing causing damage and potential bearing failure (picture below). It is so much better to just repack your bearing properly at the recommended interval. Repacking wheel bearings
© RV Lifestyle Magazine
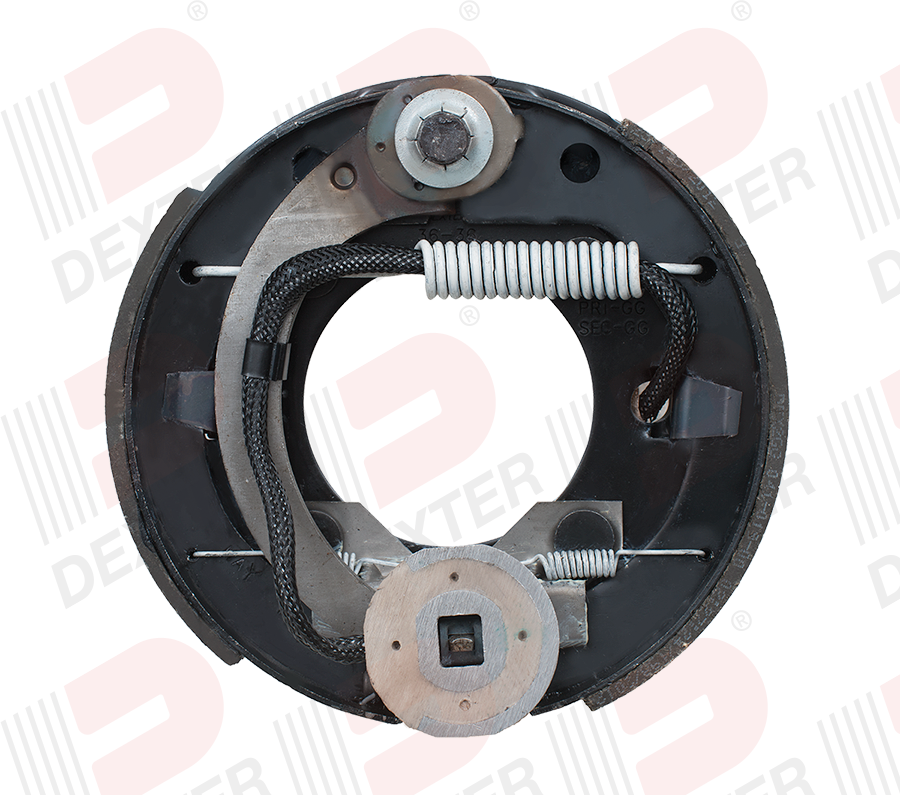
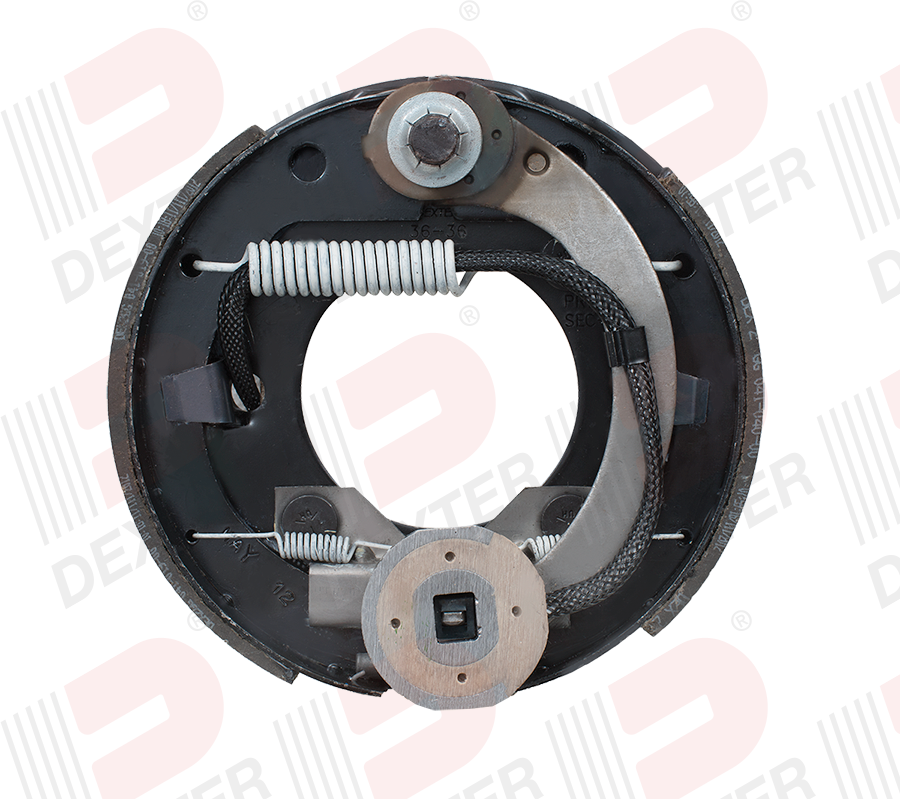
Brakes
Originally the 13′ boler did not come with electric brakes, and unfortunately you cannot usually add brakes to an original axle unless the axle has the brake mounting flange already attached. Although you can buy the brake flange separately you cannot weld it on to the axle because the heat from welding will destroy the elastomer and ruin the axle. When you need to replace your axle it is highly recommended that you include brakes, they add a proven degree of safety when towing. NOTE: The original axle orientation for a boler has the suspension arms facing forward, this is reverse to the normal installation. When installing a new axle with brakes the brake assemblies (backing plates with shoes) will have to be swapped side to side to work properly. The curved arm with the magnet attached needs to be located towards the front of the trailer (note the silver coloured arms in the picture below)
Door & Door Fit
There are a number of reasons that will cause your door to not close or seal properly. There is a common misunderstanding that all boler doors lose their shape or sag over time causing them too fit poorly and not seal, this is not totally true, some of the common causes include the following, listed in the order they should be diagnosed. The Frame, Body & Structure, Door itself, and problems resulting from DIY Fixes and Modifications of the trailer. Read my article on the causes and how to fix them boler Door Adjustment & Fit
Door Hinges
The hinges on your boler door are very unique and beautifully engineered. Called a self centering hinge they are the only type of hinge that will work with a curved door on a curved surface. As the door is opened the hinge pivots around the brass ball, not the vertical bolt, this allows the pivot point to change throughout the swing. All the vertical bolt does is prevents the hinge from coming apart, it MUST NOT be tightened, the spring will keep some tension on the bolts but the bolt should move up when you push on the nut, if the bolt is too tight it will bind and cause the fibreglass to crack around the hinge mounting surface.
These hinges are designed to be rebuilt, the brass ball will wear over time and often the spring and bolt will corrode. The hinges are easy and inexpensive to rebuild using the stainless steel hinge rebuild kit offered through Camping Treasures. Full instructions for rebuilding the hinge is available on the website under Installation Instructions.
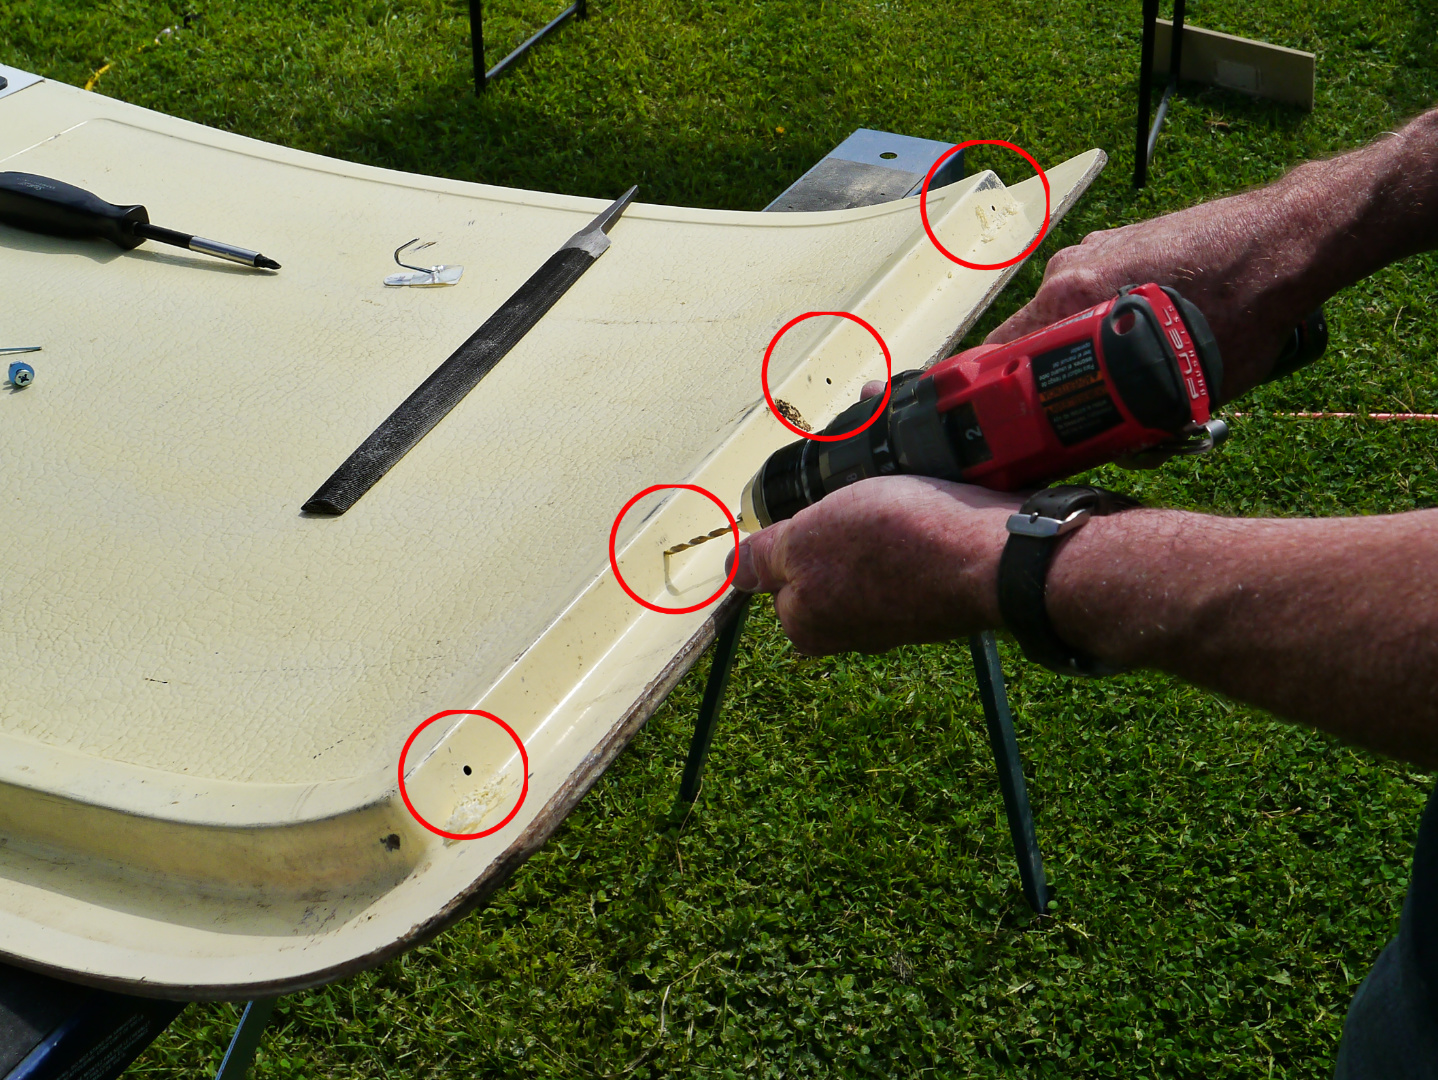
Water in Door
If the window in the door leaks at all, water can collect inside the door cavity. Since there is no place for the water to drain it will collect over the years slowly willing the cavity with water. This water can cause several problems:
- Water is heavy, as the door weight increases this puts extra stress on the hinges causing them to wear faster and often they will move where mounted to the body resulting the door dropping and becoming misaligned.
- On the solid core door the fibrous material inside the door will absorb the water, expand and cause the door to deform and go out of shape. Further damage can result if the wet core freezes
- On the door with the moulded inner panel, If the water in the door freezes it can expand damaging the door including the lamination between the two panels.
Draining water from the door: Every owner should drill drain holes in the bottom of their door to allow any water that gets inside the door to drain out. Drill three to four ⅛” diameter holes along the lower profile of the door as shown in the attached pictures.

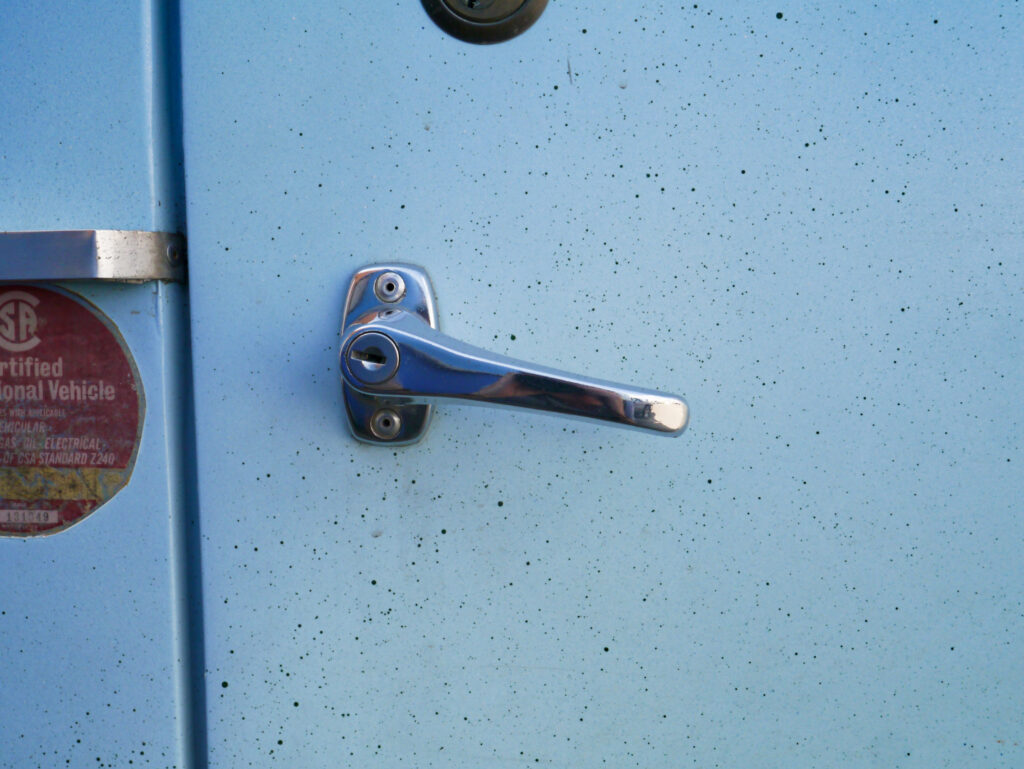
Door Lock
boler used two different door locks, from 1968 to 1974 a utility slam latch commonly called a “Canned Ham” door latch was used, this is a very reliable latch but lacks a reliable inside locking feature, the original used a simple pin or nail inserted into a hole on the inside to jam the latch from moving. From 1975 to 1988 a Bargman L400 door latch was used, this lock was discontinued in late 1999 to early 2000, these locks and parts for them are very difficult to find, and the prices for even worn out locks has skyrocketed to often several hundred dollars.
An option for both these locks is available, I have developed lock replacement kits the utilize a very reliable and secure modern RV door lock along with specialized mounting plates and hardware to retrofit your boler Camping Treasures
Jalousie Windows
In my opinion it is very hard to improve upon the design and function of the original jalousie windows. They have the advantage of allowing 100% ventilation for their area and you are able to keep them open during rain without getting water inside. Modern radius corner windows only open 50% and allow water in when its raining.
Parts are available to rebuild your jalousie windows including all the seals and the crank operators. A trick if you are rebuilding your windows is to heat the aluminum frame with a heat gun around the frame assembly screws, this expands the aluminum and the screws will usually unscrew without breaking. Reassemble with new screws and apply some anti-seize compound to the threads.
Resealing & Installing Jalousie
If your jalousie windows need to be remove for painting or because they are leaking here are some helpful tips.
Most jalousie windows are held to the body with rivets, although some are screwed into wooden frames on the inside. Whatever fastener you have they are hidden behind the vinyl trim around the outside of the window frame. For the rivets carefully drill just the head off with a 1/8″ drill bit, then using a small punch or even a nail tap out the shaft, you don’t want to damage or enlarge the hole through the fibreglass. There will be a backing washers on the inside of each rivet, save these for use later during reassembly. The old butyl tape remains sticky forever, the windows will take some gentle persuasion to remove. Using a putty knife of similar tool, being careful not to scratch or damage the fibreglass gel coat push the putty knife behind the window mounting edge, working your way around the window. Continue working around the window a second time but this time press on the inside of the window frame, the window will start to loosen and seperate from the body. Continue this process until the window is fully removed.
Thoroughly clean all the old butyl tape from the fibreglass and the window frame. Place a strip of 1/8″ thick by 3/4″ wide butyl tape around the window frame and place the window into the opening making sure it is square. If the window is not square the window panes can bind when opening or not close fully.
Using #8 machine screws (small nuts & bolts) in the original rivet holes progressively tighten the machine screws around the perimeter, this will ensure the windows are evenly seated and bedded into the butyl tape. Once all the machine screws are tight remove them one at a time, insert a 1/8″ aluminum rivet into the hole, add the backing washer and set the rivet. This method will ensure your windows are installed correctly and will provide years of reliability.
Jalousie Window Hinges
Another common problem is the pivot pin on the cast aluminum hinges will break. The hinges are sold in pairs and are very inexpensive, the common replacement is Strybuc #835, the number 835 can be followed by either a C or a P this is just the packaging suffix. They are available online and also most RV parts departments will either have them or can order them in. An example https://vintagetrailersupply.com/835-philips-hinges-pair-vts-846/
They should be attached to the side arm using a Tubular Rivet, these are hardened and designed to not clamp tight, allowing the hinge to move freely, you will also need a setting tool https://vintagetrailersupply.com/tubular-rivets-for-jalousie-clips-vts-963/ and https://vintagetrailersupply.com/hand-rivet-clincher-for-5-32-tubular-rivets-itm-963/
Front & Rear Acrylic Windows
The front & rear windows are 3/16″ (4.5 mm) acrylic or polycarbonate material. You must use this thickness of material, thicker like 1/4″ is too stiff and will not flex into the compound durve of the body, thinner and it will flex too much and not stay in place.
Common sources for a leak in the front or rear window include: Old seal that is dry and hardened. Incorrect parts, using the wrong window seal where the body & glass channels are not the correct size (use AS987 or LK987), Cutting the seal too short when installing, the cut ends should overlap by about 2 cm and the forced together at the bottom of the opening, this ensures the join & the seal remains tight. Installing the seal backwards, the locking strip or tab must be facing the outside. Window cut too small for the opening.
The size of the front & rear windows can vary slightly, also the size does depend on the gasket that you use. In general you measure the cutout opening then measure the centre web thickness of the gasket and subtract two times that thickness from both the width and the height. If you are using the recommended AS987 or LK987 for the gasket the web thickness is 0.265″, so doubling that you would subtract between 17/32″ or 9/16″ from the opening measurements
Polishing the Aluminum
The term polishing aluminum can be done a number of ways and the results vary considerable. In general polishing aluminum means the removal of aluminum oxide that forms on the surface, the aluminum version of rust. I’m going to start by saying DO NOT USE STEEL WOOL, although it will remove the oxidation and leave a consistent grained surface it also will embed tiny particles of steel into the aluminum. Exposure to water will cause a reaction between the aluminum and steel called galvanic corrosion with will result in rapid oxidation and pitting of the aluminum surface. Read my full article on the different products, methods and results for Cleaning & Polishing Aluminum
Roof Vent
The original roof vent is a 9″x 9″, there is a replacement the same size, (Heng’s 18511-C1G White or 17511-C1 Colonial White), are available but it is not a great option. These roof vents are designed to be used in a bathroom and does not seal well if the vent is open at all, even just a crack. The lid has a very small lip that does not divert the water away from the vent opening, instead water will run around the lip and onto the floor.
Replacing the original vent with a 14″x 14″ vent is a good option, the larger vent more than doubles the roof ventilation area but does require a larger opening in the roof. Make sure you enlarge the opening toward the front and centre of the trailer roof, this keeps the vent on the flattest area which allows for a better seal around the mounting flange. I personally like the metal vent, ( Ventline V2110 Ventadome), you won’t have maintenance problems with the vent cover cracking, although it is slightly noisier in the rain. I applied 3M Sound Reduction Mat 38500 on the inside of the lid which reduced the noise considerably.
Power Roof Vent
A power roof vent that uses an electric fan to help circulate air through your boler is a great addition. MaxxFan and Fan-Tastic both make very good units. One thing to note is these power vent fans are designed to fit in a conventional RV which has a roof 1.5″ thick, for it to work on the thin boler roof you need to build a curb or raised section on the roof to mount it. If you have DIY talents I recommend you make your own, my design has a number of advantages over the commercially available units. DIY Power Roof Vent
Solar
Solar panels are a great addition and have made boondocking for longer periods of time easier. I often get asked “Can I run a refrigerator on solar?”. The easy answer is you cannot run anything on a solar panel, let me clarify. A solar panel is a sun powered battery charger, during the day it recharges your batteries, your electrical devices use the power stored in the batteries, a solar panel recharges and maintains the energy in your batteries. The size or output of the solar panels you need depends on several factors including: the capacity of your battery or batteries, how much power you use, the amount of sun and time the panel(s) are exposed to direct sun. Here is an article by an expert.
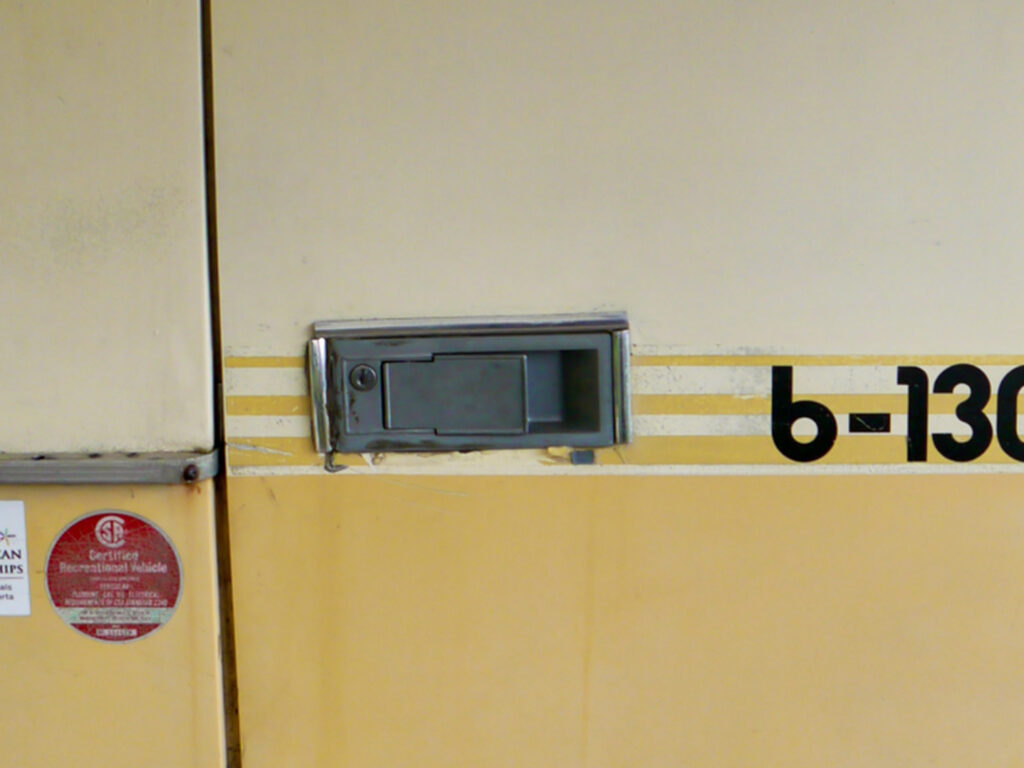
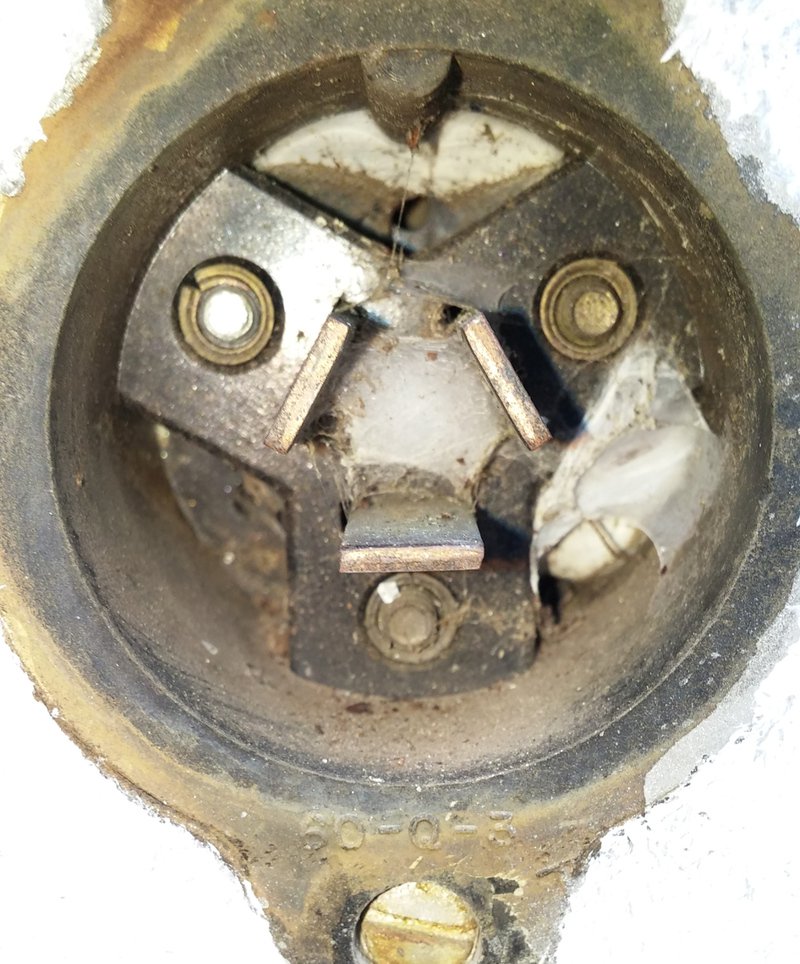
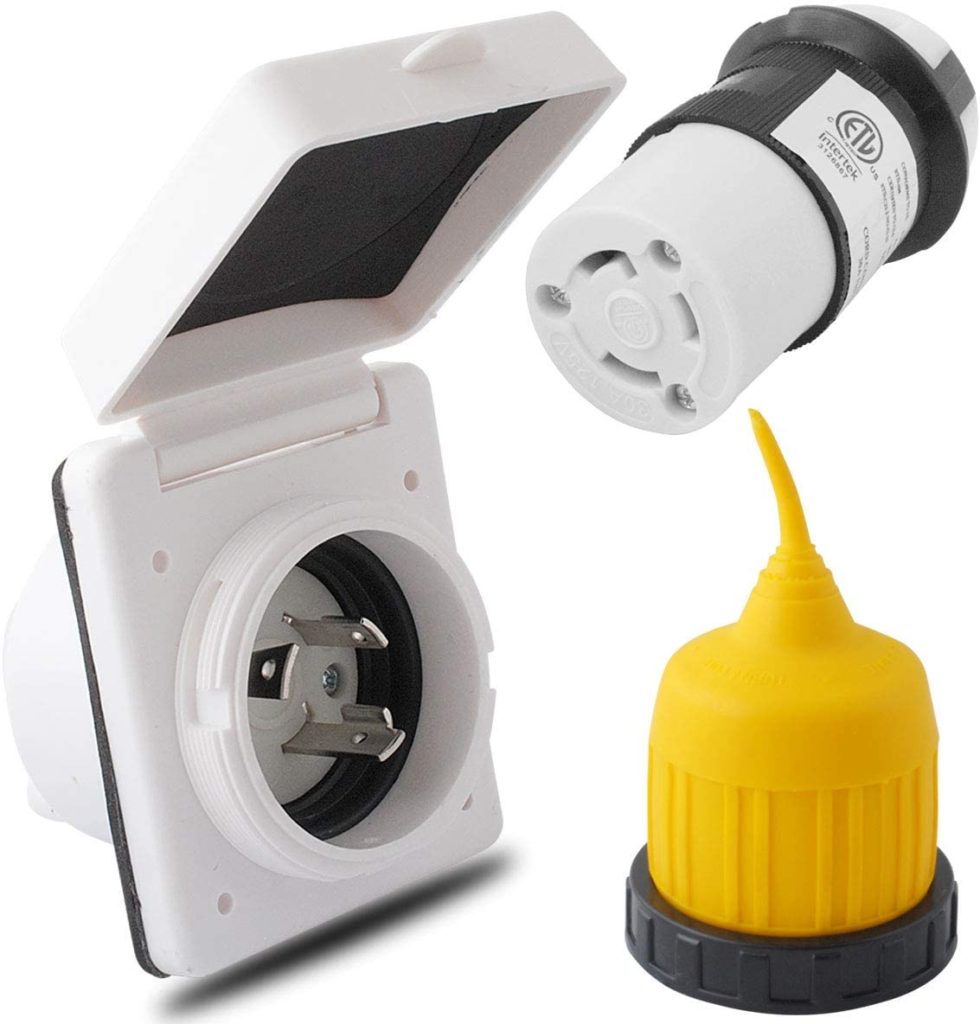
Outside Power Cord & Connection
Many boler’s have an electrical outlet that looks like the one pictured, this is a Bargman 125 volt, 35 amp receptacle. The receptacle and the cord were discontinued many years ago and are no longer available.
The best solution is to replace with a modern 125 volt, 30 amp receptacle and cord, these are available through local RV parts departments or through online stores.
Cleaning the Ensolite and Fiberglass
The interior lining or insulation was a very high tech product made in the 1970’s from a closed cell foam called ensolite laminated to a tough vinyl outer layer, it is often called Elephant Skin. Both the lining and the fiberglass cabinets are extremely durable, most standard cleaners will work without causing any harm with one exception, the acrylic windows (see Care and Cleaning of Acrylic Windows). It is always best to try to clean the vinyl surface first, often any staining and discoloration can be removed leaving a clean soft white interior. The non-painted surface will be easier to clean and maintain, on badly discolored walls some people have had success using Spray 9, Simple Green or even a Magic Eraser, but if all your attempts fail you can always paint the interior. I carefully researched and tested the following method and it has stood up very well over the years. Painting the Ensolite Wall Covering
Seams
Originally boler used a foam tape to cover the seams in the ensolite, but with time the adhesive dries out and the tape falls off. I have tested literally dozens of types and brands of seam tape and none of them have lasted for any length of time. I have found the best solution is to use latex caulking, DAP DynaFlex 230. It will take several coats to fill and if you use a damp sponge the final coat can be textured to match the ensolite. More information can be found in my article on Painting the Ensolite Wall Covering
Replacing the Ensolite
Insulation on the inside of your boler is very important, in the small enclosed area moisture builds up quickly and condenses on uninsulated walls. Only consider replacing the ensolite as the very last option, it is a huge amount of work and quite difficult to install new material on the curved shell. Replacing Ensolite Wall Covering
Cleaning & Waxing
Treat your boler like a fibreglass boat, products designed for marine waxing & polishing is the best. Meguiars Marine has an excellent line called Flagship Marine. 3M also make quality fibreglass polishes and waxes. Stay away from automotive waxes, many contain pigments that when used on fibreglass gel coat will absorb into the pores and tint the gel coat (for example many Turtle Wax products are tinted green and will result in a green tint).
Gel Coat
The exterior surface of your boler is fibreglass gel coat, this is a very durable product that lasts many decades. Gel coat, although very durable is quite soft and porous so be careful with any aggressive polishing compounds or polishing equipment, you can easily damage or gouge the surface. Chips and damage to gel coat can be repaired, the best source for information on this is to search fibreglass boat repair or talk to a local marine repair shop that specializes in fibreglass repair.
One thing to keep in mind is if you plan on painting the gel coat avoid using any wax or sealers on it. The porous nature of the gel coat will absorb and trap the waxes under the surface, this means they will not be removed when sanding and can result in “fish eye” or a flawed finish where the paint does not flow evenly over the surface.
Structure
The fibreglass shell of your boler is only 1/8″ thick, support structure is built into the interior cabinet design to maintain the boler shape and strength. The main supports which must not be removed are: the closet on the left side of the entry door; the metal support post on the right side of the door by the hinges;, if either of these support members are removed the wall will sag and there will be considerable door gap, it is also possible the entire wall can fail and the roof can collapse. The horizontal ledges below the front & rear windows prevent those walls from flexing, it they flex too much while being towed the widows can pop out and be blown into the trailer.
Most boler’s have a metal support between the upper and lower kitchen cabinet, although this part is not structural to the trailer it does support the upper cabinet which is only attached to the body shell by 10 rivets. The weight of items stored in the upper cabinet when bouncing down the road places a lot of force on the rivets resulting in stress cracks in the gel coat and making the rivets loose which can then leak. Any support for the upper cabinet helps, you can make one from spindles, pipe, a sturdy tree branch or any similar item that compliments your interior design.
Cracks
Cracks in the fibreglass, be they very small spider cracks or large cracks through the fibreglass body, are all caused by stress.
- Spider Cracks
- These are very small hairline cracks in the gel coat
- They are very shallow and do not affect the structural integrity or result in leaks
- Usually form around a point load, often at a rivet where stress is concentrated
- Cause can be from load. i.e. heavy items in the upper cupboard above the kitchen (the reason to have a support post between the upper and lower kitchen cabinets)
- Twisting of the body, usually from a bent frame, they will appear by the front window
- The cause must be addressed first or any repairs you make will not last and the spider cracks will soon appear
- Large Cracks
- Usually caused by;
- Impact (i.e. like a falling tree)
- High stress loads (i.e. heavy snow load on the roof)
- Major flexing in the structure (i.e. broken, bent or twisted frame)
- It is VERY important to repair the cause before attempting repairs to the fibreglass. It is common that cracks will form at the corners of the door opening if the frame is bent or broken, these are caused when the body twists. If you repair these cracks without addressing the cause the fibreglass shell will be repaired in a twisted state resulting in many components being out of alignment and ongoing problems
- Large cracks are usually repaired from the inside of the trailer with several layers of fibreglass cloth with resin. (the video below shows a technique that I personally used on my boler with excellent results).
- Usually caused by;

Belly Band
The trim around the middle of your boler, commonly called the belly band, is strictly decorative and should not have any sealant or caulking applied to it. The boler body is made up of an upper and lower section, each section has a small lip which is the edge of the mould, during assembly the two halves are joined together and fibreglass cloth and resin is applied to the inside at the seam in the middle to create a strong and sealed body. The aluminum trim which is 5/8″ x 5/8″ aluminum “C” channel just covers the moulding flange.
It is not a fun job to replace the belly band but if you need to don’t use the aluminum channel found at home improvement stores, it is anodized and hardened and does not bend without kinking. You want 5/8″x5/8″ aluminum mill finish, usually a 6061 hardness which can be formed. Try local metal suppliers like Metal Supermarket. I have had luck bending it by cutting a groove in a two foot long 2″x4″ that the channel just fits into, then carefully using the wood block to form it around the curved body.
It is very rare but on occasion the fibreglass join on the inside contained some air pockets and does not seal completely. Most leaks are from the seal around either the front / rear windows, the side windows or lose rivets. The water will then migrate behind the ensolite and often appear at a location some distance from the source of the leak.
Painting the Fibreglass
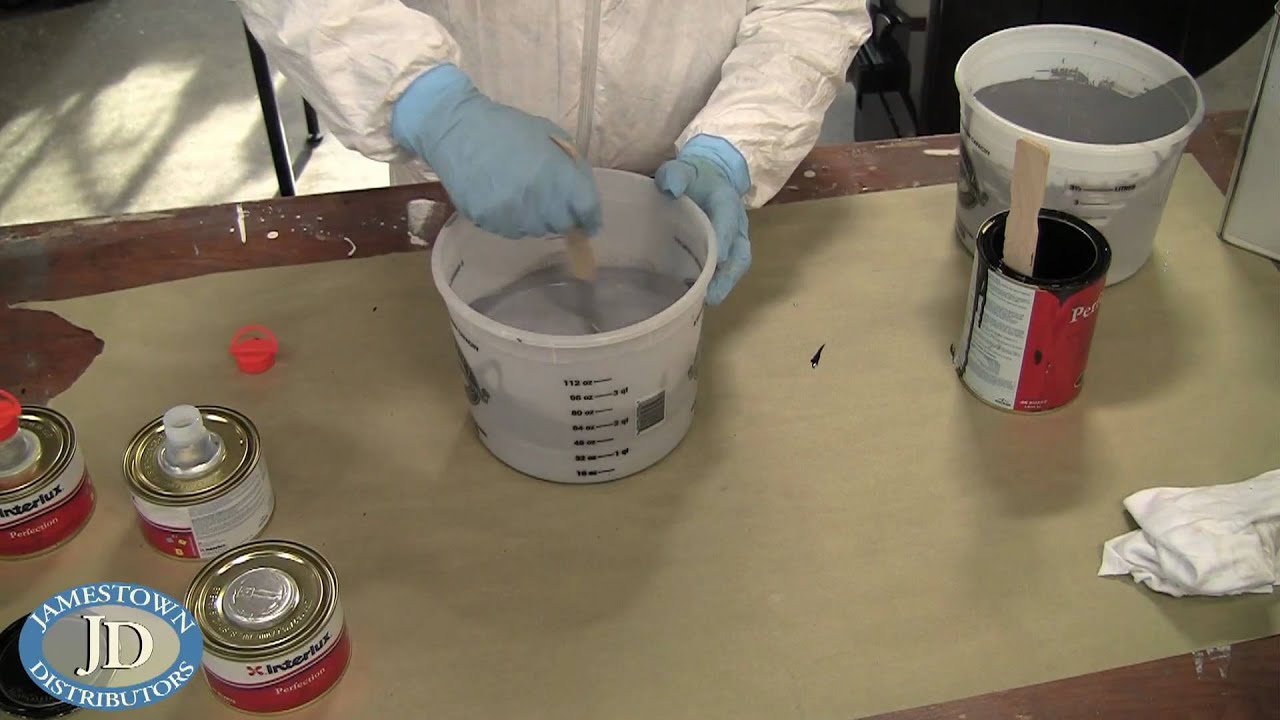
The best exterior paint for your boler is the same as for a fibreglass boat. Considering a boat is exposed to harsher conditions than your boler it is a proven long lasting finish. Using a marine topcoat like Interlux, then apply it using the Roll & Tip method, a DIY can paint your boler at home with professional results
Polishing the Aluminum
The term polishing aluminum can be done a number of ways and the results vary considerable. In general polishing aluminum means the removal of aluminum oxide that forms on the surface, the aluminum version of rust. I’m going to start by saying DO NOT USE STEEL WOOL, although it will remove the oxidation and leave a consistent grained surface it also will embed tiny particles of steel into the aluminum, exposure to water will cause a reaction between the aluminum and steel called galvanic corrosion with will result in rapid oxidation and pitting of the aluminum surface. Read my full article on the different products, methods and results for Cleaning & Polishing Aluminum
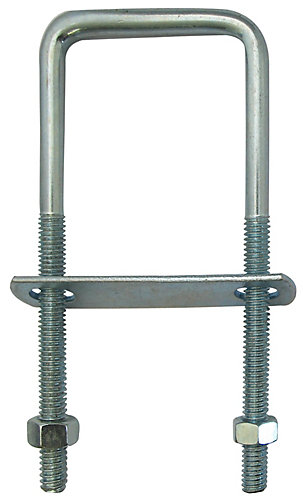
boler Frame
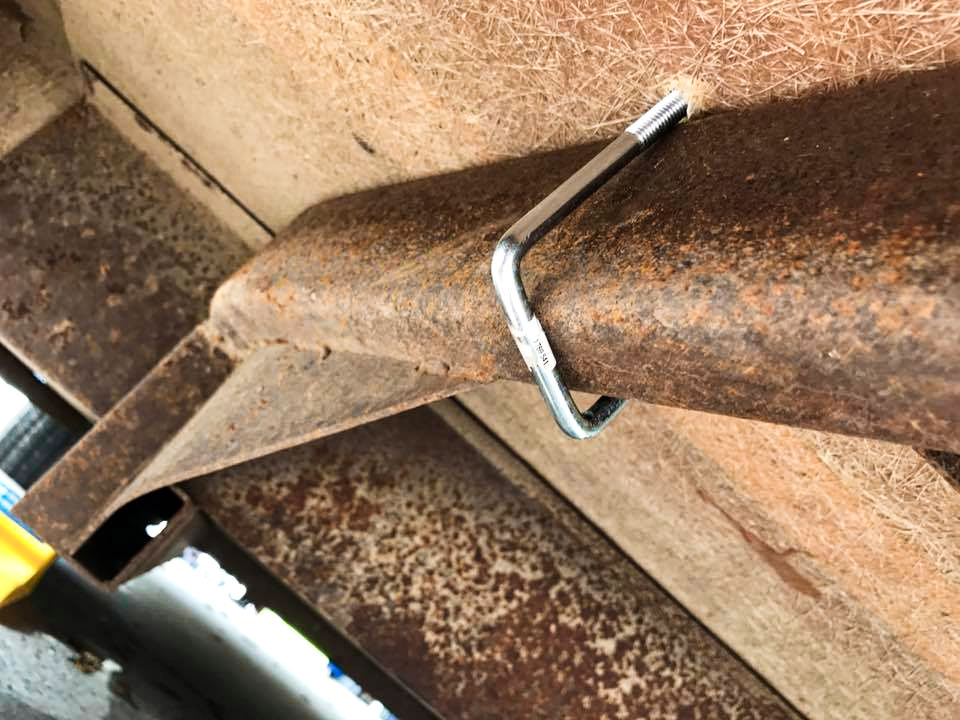
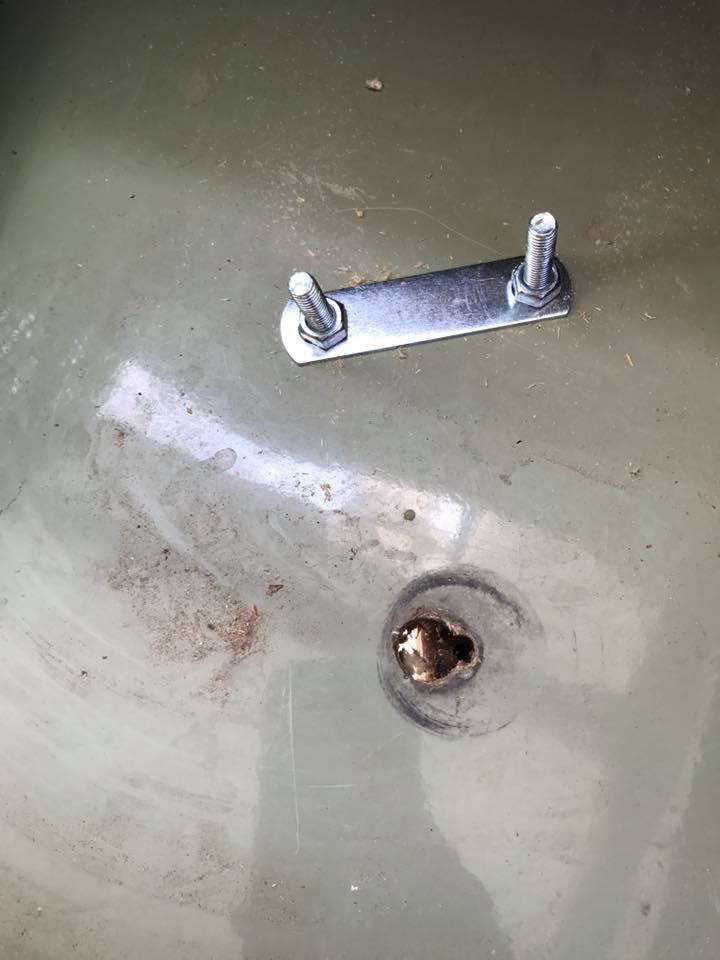
Like the foundation of your home the frame keeps every part of your Boler body straight, square and stable. Many problems seen throughout a Boler can be traced back to a bent, twisted or broken frame. It is critical that the frame and body of the boler are securely attached to each other which greatly increases the strength and rigidity of the trailer. The original fastener used to connect the body to the frame often fail, small metal screws and a few bolts were used, over time these loosen or break. If your frame has welded tabs these are the best for attachment, Tabs avoid putting any holes in the frame which can cause cracks and allow bolts to securely attach the body. If your frame does not have tabs, which is common on most frames, the best way to connect the body to the frame is either U-bolts straddling the frame Using a minimum of four u-bolts, one in each corner under the front and read dinette benches, and large fender washers on the inside. Do not drill into or through the frame as this causes a stress point where cracks will develop from. About the Boler Frame
Bike Carrier or Rear Storage Box
Trailer balance and load is very important to ensure your rig is stable while towing, you need between 10% to 15% of the gross trailer weight on the tongue, anything less than 10% usually results in dangerous trailer sway. Any weight behind the trailer axle reduces the tongue weight. An average boler 13′ weighs about 1500 lbs which means you need 150 lbs to 225 lbs at the hitch. It is NOT recommended to carry anything on the back of your boler excpt the spare tire. This video demonstrates how weight affects sway
Water Supply
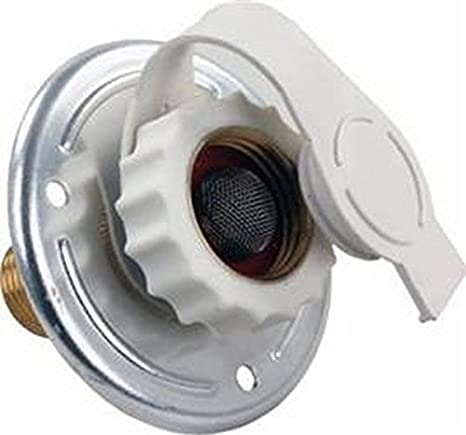
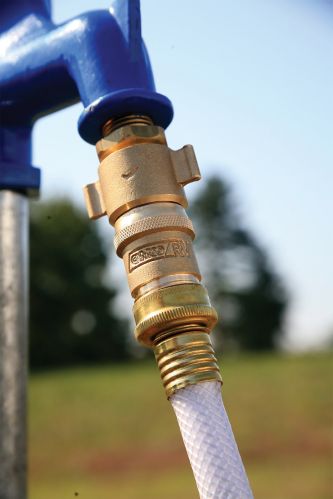
Supply or fresh water in a boler comes from either the fresh water tank located under the dinette seats or under the dinette floor, or by connecting a water pressure hose from a water faucet to the female hose connection on the left side of the trailer. Inside the fresh water tank is connected to a hand pump faucet by the sink, the street pressure water is connected to a seperate sink faucet.

An alternative for fresh water tank is a DIY External Water Tank. Read on the advantages and how to make it in my article. External Water Reservoir
Exterior Drain Connection
There is no grey water tank on a 13′ boler, the sink drains to the male hose connector on the outside of the trailer where you connect a short hose that empties into a bucket. Crude and simple but it works
Winterizing you boler
- Water & Drain System Drain your fresh water tank and water heater if you have one. To remove water from the supply lines you can use compressed air, but never exceed 40 psi, a higher pressure can damage the water lines and pump. The purpose is to remove all the water, especially any water in low points. You can also use RV antifreeze (NEVER USE automotive antifreeze) and pump it through the water lines, if you plan to do this I recommend adding a “T” fitting and valve to the supply line close to the fresh tank, that way you can add the antifreeze just to the supply line and keep it out of the fresh water tank.
- Electrical Remove the battery. A fully charged lead acid battery will freeze at -70°C, but as the battery discharges the electrolyte acid grows weaker until at full discharge the electrolyte becomes almost pure water. A discharged battery will freeze at 0°C, as the electrolyte freezes it expands often breaking the plastic battery case or internal plates ruining the battery.
Remove the battery and use an intelligent battery charger or battery maintainer to keep the charge topped up over the winter. It is a myth that storing a battery on a cement floor will discharge or damage the battery. Decades ago battery cases were made from compressed rubber which allowed some of the electrolyte to absorb into it and when in contact with a cement floor would cause the battery to slowly discharge. Modern batteries use a strong, acid resistant, non-conductive, ABS plastic eliminating any leaking or external discharge problems. - Clean the Interior Remove all food and scented products that may attract mice, insects or other animals. See topic below on Mice
- Wash & Wax It is recommended that you protect the exterior of your boler for the winter by cleaning it and applying several coats of marine fibreglass wax, like Meguiars Flagship Marine or 3M Marine wax to the exterior. This will protect the surface from the sun’s UV rays and prevent dirt and snow from sticking to the surface. Do not use automotive waxes on fibreglass gel coat. Many automotive waxes contain coloured pigments which can absorb into the pores of the gel coat permanently tinting or staining lit. Also see topic below on Should I Cover or Tarp my boler?
- Cushions If you have room to store your cushions inside that is the best place, if you have to leave your cushions inside your boler, prop them up so air can circulate around them
- Condensation and Humidity when in storage is very difficult to control. The key to reducing moisture inside your boler include air circulation, keep a window and vent opened a crack, heat because hot air can hold more moisture, and use a dehumidifier or moisture absorbers
Here is an excellent article on dealing with condensation and humidity - Regular Visits Check your boler often, if there are any issues you can catch them early. Also many insurance policies require you to check your trailer in storage every 30 days
Mice
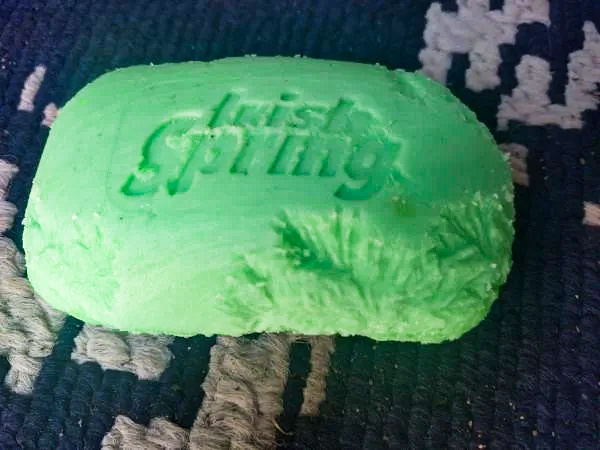
You will read about mouse deterrents like Bounce Dryer Sheets, Irish Spring Soap, and Peppermint Oil, all these have just as many reports of them not working as those who swear by them. There does not appear to be any proven or reliable mouse repellent, you can find success and failures with just about every product.
Key preventative measures include removing all food & scented products from inside and around your trailer, store your trailer on gravel or pavement (avoid grass & vegetation), lift the trailer so the wheels are off the ground (support the trailer frame close to the axle, but don’t lift or use stands under the axle), plug any obvious holes with steel wool or metal scouring pads.
Should I Cover or Tarp my boler?
Even though your boler is made from very durable fibreglass the elements can be very hard on your boler. A very common question is about using a cover or tarp, first NEVER cover your boler with a tarp. A tarp will trap moisture under it and inside your trailer resulting in mold and mildew growth. A fitted breathable trailer cover has advantages and disadvantages, advantages include protecting from the sun UV rays and snow / dirt directly on the gel coat surface Disadvantages include damage from the cover rubbing on the surface, this damage is increased if any dust or dirt gets under or embedded in the cover. Also you have to watch in areas that have freeze – thaw cycles any moisture in the cover can freeze and trapping moisture under the cover again resulting in mold. Probably the best winter or off-season protection is a portable shelter, these are affordable but check local bylaws before installing one.
Revisions
12/11/2020 Post created
12/15/2020 Added Water in Door to “Door, Windows & Vents”
12/15/2020 Added What Size is the Coupler? to “General Information”
Susan Baczkowski
What would be the best porta potty for a boler American 1971 13 foot and where are some
optimum spots for it.
Ian
Choosing a porta potty is a very personal selection, but I will tell you what I have and recommend.
I use a Pett Toilet in my boler, there are several reasons that include; this is a dry toilet system, no liquids to slosh around and spill, clean-up is a breeze. Light weight, only weighs 7 pounds. Compact, folds down to the size of a large briefcase, then unfolds to be the height and seat size of a standard toilet. They are available at many sports stores or through their website Clean Waste Systems
Tara
Hello, some of the original rivets for my cabinets have broken. They are being replaced with stainless steel carriage bolts. What is the best way to seal these and prevent any leaking?
Ian
Carriage bolts are quite large, a better option would be to use #8 machine screws which are also available in stainless steel, these are small nuts and bolts that will fit in the original rivet holes. Using machine screws the best way to seal them is to use bonded washers, these are slightly cupped washers that incorporate a rubber seal. Bonded washers should be available through lockal bolt supply specialty shops (I doubt any big box home improvement store will have them)
Tara
Thanks Ian! I used the bonded washers and they look great! I’m working towards replacing all the original rivets this way. Thanks for the advise!
Richard Walmsley
We have a 1978 Boler 17’er . Our electrical breaker “trips” very easily . We cannot run a fan and a coffee maker at the same time . Does anyone have a suggestion on how to safely increase the ampage ? Thanks for any help .
Ian
Circuit breakers can become weak over time which will cause them to trip at a lower amperage than designed. Replace the breaker with the same amperage as is currently there. The wiring in your boler is 14 gauge and designed to carry a maximum load of 15 amps.
Sharon
Can I clean the inside of my boler with tea tree oil ? I am thinking particularly of the dark grey around windows that may be mold on the elephant skin?
Ian
I will be honest I had to look up “tea tree oil” I have no idea how well it would work. The vinyl covered ensolite (elephant skin) in a boler is very tough, you can use any household cleaner on it including mold killing products like Spray Nine marine. If you want to try Tea Tree Oil I am confident it will not harm the ensolite.
Richard Walmsley
Hello again Ian – not sure if my last question went to you . Anyway , I took off the panel to my Powertron 15 amp converter and the breaker pin plate is riveted on but to the right of it ate two red buttons . One moves in and out but the other is stuck – are they fuses for the converter ? Also , where is the main fuse box for our 1978 Boler 17’er ? The fridge works on propane but not on 120 volt , so would there be a separate fuse on the fridge ? Thanks again
France Horth
Où puis-je trouver une porte d’origine pour ma boler 1971
Ian
The only option for a replacement door is from Scamp trailers. Double check the measurements from your door but the early Scamp, 1971-2005 (64.5″ tall) should fit.
https://www.scamptrailers.com/product/scamp-door-for-all-sizes. I do have to ask why you need a new door, in most cases door fit is a problem with the body or frame, please review my article on door fit https://www.boler.ca/2019/08/09/boler-door-adjustment-fit/
Paul Kummer
Hi Ian, I am considering changing my 13′ Boler tires & wheels from the original 175/80 x 13 to 175/65 x 15. I have read numerous articles on using light truck tires (I’m hoping to find 6 or 8 ply to match the trailer tire load rating) and will be looking for appropriate rims. The trailer tires wear out too fast. What would you suggest? Are there any factory light truck rims that might work?
Ian
13″ ST trailer tires have plenty of load capacity for a 13′ boler. I would be checking other areas for the cause of your tire wear, like axle alignment or wear. I have pulled my boler tens of thousands of km and never had excessive wear. Changing to larger or higher load capacity tires will not help if the problem is in the axle or is another issue.
Paul
Thanks Ian. There may be a bit of an axle alignment issue as the tires appear to wear more on the outside edge. The right wears first more than the left side.
I stayed with the 13″ tires as our local tire shop had an 8 ply radial (previous tires were 6 ply radial). We were putting a lot of mileage on then previously, as they were cross country jaunts of about 5800 km. So after about a trip and a half (8700 km), tires were showing the cords in spots.
Do you have an idea what axle alignment involves? There is a place close to us that works on a variety of travel trailers.
Ian
Trailer axles are extremely durable but also very fragile. All it takes is jacking up the trailer by under the axle rather than the frame to bend the axle. I would suggest contacting a frame alignment or trailer axle company, a travel trailer shop would not have the equipment or skill, it is an art to align a trailer axle as they need to be bent to the correct alignment specifications
George Mathews
Can a Boler camper be moved around by one person?
Ian
A hard question to answer. In general the average 13′ boler weighs 1400-1600 lbs (about 1/2 the weight of a small car) with a tongue weight of approx 150 lbs. With a wheel on the tongue jack and on a flat hard surface yes one person can move a boler.
Denise Desbiens
Bonjour,
Où puis-je acheter fenêtres et poteaux pour le lit simple s’il vous plaît.
Je vous remercie!
Ian
Bed posts can either be made or bought through scamp Trailers. The Jalousie windows you cannot buy new but seals and other parts are available to rebuild them, CampCan.ca has the seals
Nadja Hall
Hi Ian! Thank you for all your input! I had posted on fb site about the jacks. Do you recommend welding them on permanently? Also just two in back or four (2 in back and 2 in front?). I wasn’t clear on that with all the answers. Thank you!
Nadja
Ian
Usually only 2 stabilizers are needed at the back, the front is stabilized by the tongue jack.
Do not level the trailer with jacks attached to the frame, leveling should be done at thye wheels with either blocks or BAL make a light trailer wheel leveler.
Lifting by the back of the frame can bend or twist the frame.
Nadja Hall
Thank you so much Ian!
Sasha
Regarding STRUCTURE
“The main supports which must not be removed are: the closet on the left side of the entry door; the metal support post on the right side of the door by the hinges”
Hi Ian,
I’ve come into a boler which has been mostly gutted, except for the bed and couch. How do I go about adding in and securing structure again?
Ian
The best way to recreate the curve of the closet wall is to use the curve of the door as a template. On mine I used 4″x4″ red cedar posts (light weight), cut the curve into the wood then cut the back side so it was 1.25″ thick, this is then epoxied & clamped to the wall. On mine I removed all the original supports but installed 4 curved wood supports to replace them
https://i0.wp.com/www.proud-canadian.com/wp-content/uploads/2014/02/P10107751-e1392478066840.jpg
https://i0.wp.com/www.proud-canadian.com/wp-content/uploads/2014/02/P10107771-e1392165682745.jpg
https://www.boler.ca/wp-content/uploads/2018/01/Buttercup-8.jpg
Dominique Forand
Hi Ian.
Where am I buy the rubber (seal) for my door? I have bought a Boler and the door did not have the seal anymore.
Thank you very much
Ian
The best place right now is at http://www.CampCan.ca they stock several types, the closest to the original has a seal connected to trim that presses over the edge around the door opening in the body. https://campcan.ca/door-trim-seal-per-ft/
Lois Murray
My 1977 Boler has an original hand pump. I was testing it out and it did draw water up into the hose. But then it became difficult to pump for two strokes and I think something snapped inside it: then, the handle was easier to pump and but water now does not move. There seems to be a vacuum in the system it that is holding the water in the hose. I would like to take the pump apart to see if I can determine what is wrong but will have to cut the hose line that is attached to the pump. However even if I do that I still have no idea about how the pump, itself, works so won’t be able to diagnose. Does anybody have a schematic for this pump? Or advice on how to work on it?
Advice greatly appreciated!!
Lois
Ian
Rebuild kits are available for some RV Hand Pump Faucets. If you search “rv pump faucet rebuild kit” there are a number of kits available. Replacement pump faucets are available or you can add a water pump to the system, although then you will also need a battery
Lois Murray
Thanks very much, Ian!
Jamie Rogers
I removed mine from my 1977 Boler. I do not know if it works, since it was not in use when I bought this camper a few weeks ago. I removed it & if you would like me to send it to you, you may have it. Feel free to message me.
Dov
I have a 1976 (ish) Boler with original interior including fridge, stove and furnace. Fridge and stove work great. Furnace has worked while in far north, but now it will not light/start. Propane making it to the Pilot Light, but after holding in for 1-2 minutes and then releasing to turn furnace On, the Pilot Light goes out and furnace does not turn On. ANY SUGGESTIONS?
Ian
Probably the Thermocouple, on the Fibreglass RV forum in the document sections there are furnace manuals. If you can find the model of your furnace and part number of the Thermocouple great. If not universal thermocouples are available, find the correct length and thread. Here is the link to the documents https://www.fiberglassrv.com/forums/downloads.php?do=cat&id=15
Dov Hodson
Ian, thank you. It’s a great furnace, or was, and I want it working again. I’ll be following your suggestions at the first opportunity. Thanks again and enjoy your weekend. dov
Dov
My RV dealer recommending the Suburban NT 20 STQ furnace for my 1977 13’ Boler. My wife likes quiet. Anyone have any thoughts about the furnace?
rob livingston
Does anyone have experience with using PL Premium or a similar product to adhere wood striping to the interior fiber glass walls/ceiling instead of fiber glassing blocks? Kevin Johnston posted a video trying it out but didn’t provide a follow-up. we bought our Boler 1700 stripped to to the fiber glass
Ian
If you don’t want to use fibreglass to adhere the blocks to the shell then use epoxy, even the 5 minute variety is better than PL adhesives. I would not take any advice from Kevin Johnston, many of his videos are wrong and can create problems and cost money, an example of this is his window installation video where he installs the gasket backwards, this results in leaks and the protental for the window to come out when towing due to wind pressure.
rob livingston
an epoxy like JP Weld?
Ian
There may be some JB Weld products that will work but many of their epoxy are besigned specifically for metal, also many of thier epoxy are slower to set and will be difficult to hold in the correct position while it sets.
Lepage and Gorilla Glue both make excellent 5 minute epoxy. When Using 5 minute epoxy only mix up enough for one block at a time, apply to both surfaces and hold it in position, pressing the block against the shell, it will adhere in a few minutes and then move onto mixing more epoxy and applying for the next block
Sarah
Hi Ian, is there a product for buffing scratches from the front and back windows? The previous owner must have used a lot of standard products! I’m thinking perhaps that kit from Lordco for buffing automotive head/tail lights? Thanks, Sarah
Ian
The product I recommend is Novus Plastic Polish, it is widly used in the retail inductry to clean and polish acrylic display cases. There are several factors that will determine if you can restore the windows; Age, old windows the crazing is deeper than fine scratched; Chemical damage, amonia and similar glass cleaners can deeply etch the surface; Plycabonate vs Acrylic, polycarbonate although more impact resistant is much softer and very difficult to restore. A Novus Plastic Polish kit can be found on-line, retail suppliers, and often stores like Home Depot and Canadian Tire.
Virginia Wiech
Hello Ian. Had you ever been to MetalArc in Red deer? If so what did you think of their finished products. Am thinking of taking my 1983 ,1300 Boler there for restoration. I live in BC , southern Okanagan Valley. Thanks for your input.
Ian
I have visited Metal Arc’s shop several times, they make excellent frames and their work I have seen is good
Virginia Wiech
Thank you! Will be heading there May 1st. 🙏
Barb Wessels
Can someone please help? I’m trying to remove the original fridge from my boler and can’t seem to get it out. I’d appreciate any advice.
Thank you!!